
Whether for 3 days or 3 weeks – with this packing list you'll be perfectly equipped for your bike tour.

„"I had way too much luggage with me at the beginning!"“
Many people embarking on multi-day cycling tours feel the same way. Our packing list will help you avoid unnecessary exertion on your next tour.
In addition, we've included some great money-saving tips and helpful advice: use what you have and keep track of everything.
Our packing lists for printing
If you wish, you can also download our packing lists and the small service checklist for printing:
Before you start packing: Bicycle & Accessories
- Your beloved bicycle (of course!)
- bicycle helmet
- Bicycle lights (front and rear)
- bicycle lock
- Cycling gloves
- (Optional) High-visibility vest/reflective band
Multifunctional clothing for your bike tour Packing list
Here's a very easy way to save weight: Use clothing that you can comfortably wear both while cycling and in everyday life.
Hooray for trekking trousers and leggings!
Clothing & Shoes: Save weight with the rule of three
- 2 lightweight outdoor trousers (short, long or with zip)
- 3 T-shirts (at least one made of natural fibers – cotton, thin wool)
- 2-3 cycling shorts with padding
- 1-2 pairs of leggings / long underwear (you can wear them underneath if it's cold, or sleep in them)
- Longsleeve/Baselayer
- 3 pairs of underpants
- 2-3 sports bras
- 3 pairs of socks
- 1 pair of warm socks
- Swim trunks/bikini/swimsuit
- lightweight trekking shoes or cycling shoes
- Flip-flops/sandals that you can also wear with socks (not sexy, but practical)
- warm, cozy, light jacket (light down jacket or similar)
Extra tip:
Check your wardrobe: What else do you like to wear when you exercise? – Use it!
Suitable for longer tours Merino or merino blend shirts, They keep you fresher for longer. Wool also provides warmth even when damp.

Prepared for any weather: rain, wind and sun protection
- lightweight windbreaker
- Rain jacket
- Rain pants
- alternatively, a poncho
- possibly rain overshoes/gaiters
- Sunscreen (at least SPF 30 and sweat-resistant)
- Lip balm with SPF
- sunglasses
- 1-2 multifunctional cloths/Banff
- (Bicycle) cap
- Gloves (if necessary)
Extra tip:
Rain pants and jacket do a good job of keeping out the rain, but you'll sweat quickly in the summer.
A poncho provides sufficient ventilation here. Try out what works for you!
Toiletries and washing supplies for your cycling trip: Less is more
- travel towel
- toothbrush
- toothpaste
- Soap/Shampoo
- deodorant
- razor
- Hairbrush/hair ties
- Travel detergent or detergent sheets
- Tissues
- nail file
- nail scissors (if needed)
- Menstrual supplies (You know best what you need)
Don't forget: First aid and travel medicine kit for your bike tour
First aid kits are available as travel sets from outdoor outfitters, ready-made in a handy bag.
In any case, the following applies: Pay attention to expiration dates.
First aid kit: This should definitely be included
- sterile dressing
- sterile gauze bandage
- sterile non-woven wound dressings
- Plasters and, if necessary, tape
- sterile gloves
- Wound spray
- Emergency blanket
Travel first-aid kit: So you can stay healthy on your bike tour
- mosquito protection
- Insect bite gel
- Tick card/tick tweezers/tweezers
- Anti-diarrheal medication (e.g., charcoal tablets)
- Painkillers
- possibly antihistamine
- Diaper rash cream (to protect against sore bottoms from cycling)
- Additional medications may be required depending on the destination country and personal needs.

Be prepared: Pack spare parts for a bicycle breakdown
- cable ties
- Gaffer tape
- Multitool
- Repair kit and/or spare inner tube
- tire levers
- air pump
- Nipple wrench
- Dirty cloth
- Chain oil
- Rubber gloves (to prevent oily fingers)
Also important for your ultimate bike tour packing list: documents
- ID card/passport
- Cash, debit cards, credit card
- Health insurance card
- Proof of international health insurance (if applicable)
- Emergency numbers (insurance companies, etc.)
- Membership card for mobility and breakdown service (ÖAMTC, ADFC, etc.)
Packing list of useful little things
- Phone holder
- pocket knife
- 2-3 clothespins
- lighter
- Ratchet straps
- Notebook, diary, pen
- Maps or travel guides
- Sewing kit
- earplugs
- small foldable backpack or gym bag (for example for shopping, stops at restaurants, sightseeing)
Extra tip:
There are also travel clotheslines with ball clips instead of clamps – great if you're going camping.
Nevertheless, we recommend clothespins – this way you can dry damp clothes from the day before while cycling.
Make sure you have enough food.
When you're flying through the landscape like that, you often don't realize how much energy you're using. And then it suddenly hits you like an arrow – low blood sugar.
Therefore, when it comes to food, the rule is exceptionally: better too much than too little!
You should always take this with you.
- 2 water bottles or CamelBak (1.5 - 2l)
- Lunchbox or suitable alternative
- Muesli bars and small snacks
- Dried fruits and nuts
- A small snack for the big hunger pang
If you want to be self-sufficient
- coffee or tea
- Muesli, porridge, or whatever you need for breakfast.
- (Plant-based) milk if necessary (Note: shelf life during transport)
- at least one meal (for example, the obligatory can of ravioli)
From camera to charging cable: Assembling your tech equipment
Technology you should always have with you on your bike tour
- (Bicycle) light (If you have a dynamo on your bike, also take a small flashlight with you)
- If you have one: power supply for the e-bike
- mobile phone
- Power bank
- Charging cable for all devices
- USB power adapter
- (Optional) bicycle computer/navigation system
- Extension cable (if necessary)
Optional: Equipment for entertainment and documentation of your bike tour
- Headphones and/or music box
- E-reader (alternatively: download books to your smartphone)
- socket adapter
- camera
- Smartwatch
- Replacement batteries
- Selfie stick, gimbal, drone, microphone (depending on how professionally you want to document your tour)
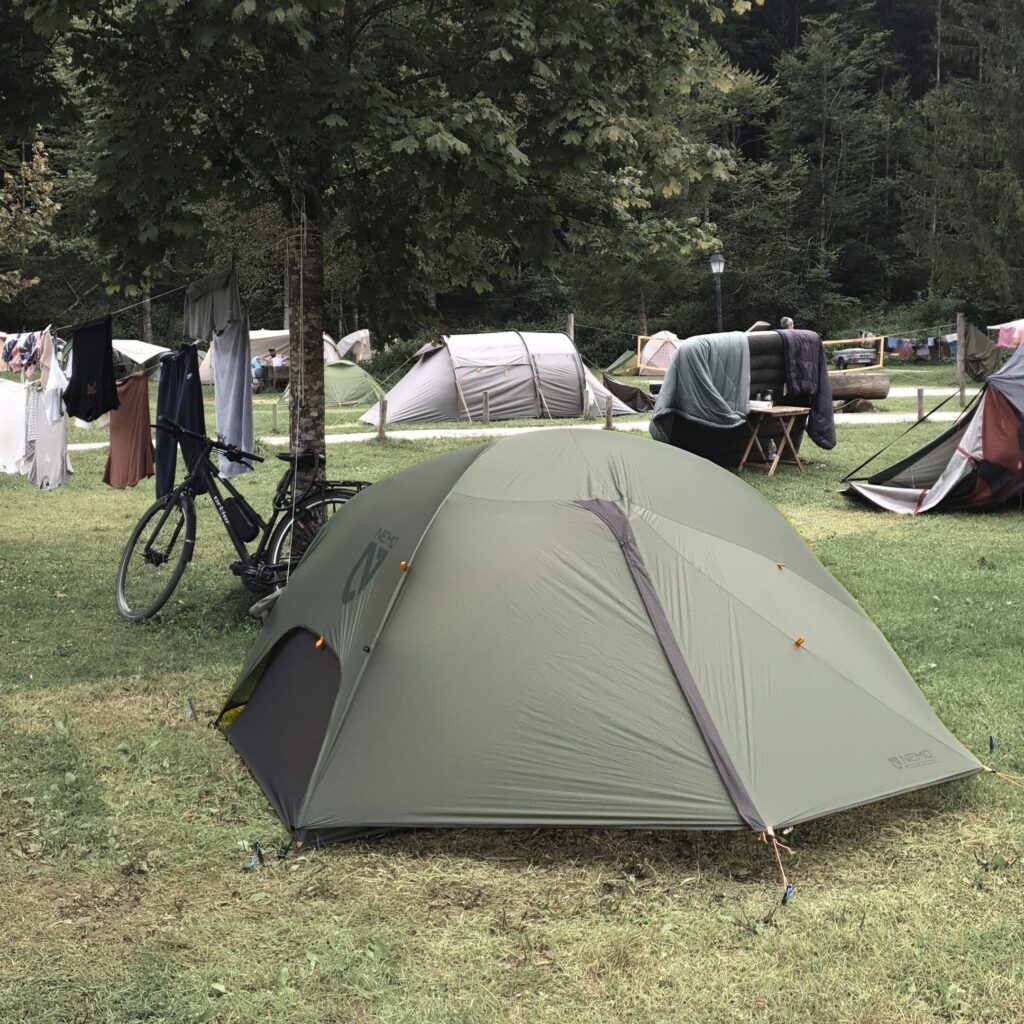
Optional: Prepare your camping gear
Camping equipment for your bike tour
- Tent
- Tent groundsheet
- sleeping mat
- sleeping bag
- (Optional) Sleeping bag liner
- Pillow (alternatively: a stuff sack filled with clothing placed under the sleeping bag)
- flashlight or headlamp
- possibly a seat cushion, picnic blanket or ultralight camping chair
Accessories for the camping kitchen
- Camping stove
- gas or fuel
- Cooking accessories (windscreen, gas hose)
- lighter
- Cookware
- Cup/Mug
- Cutlery
- Dish soap
- Dish sponge/cloth
- Add salt and pepper if desired.
Extra tip:
If you want to try camping and don't want to invest several hundred euros in equipment, you can here also rent.
The right panniers for your bike tour
The most pragmatic bicycle touring luggage I've ever encountered was a large sports bag and a tent in a 5-euro wire basket. The whole thing was secured with a bungee cord to an old 3-speed women's bike with a coaster brake. Works!
Our experience shows that three classic bags make sense:
- 2 large pannier bags (Two single bags are easier to handle than a double bag)
- handlebar bag
- Possibly 1-2 frame bags for tools etc.
A backpack can be a useful addition, but it is not recommended as your main piece of luggage because you always have all the weight on your shoulders, your back, and therefore on your bottom.
Extra tip:
Investing in high-quality brand-name panniers is worthwhile if you regularly go on bike tours. However, we've also had good experiences with mid-range panniers.
Extra tips: Pack your bags with structure
Tip 1: Pack according to your daily routine rather than by topic.
Instead, think about your daily routine and prioritize:
-
What do you regularly need when you're out and about?
This goes on top of or inside handlebar and frame bags. – Examples: snacks, mobile phone or camera, lip balm, sunscreen, sunglasses, valuables, documents, etc.
-
What do you need quickly while you're out and about?
This goes on top in your panniers. – Examples: rain, wind and cold protection, first aid kit, travel medicine kit, etc.
-
What do you need when you take longer breaks?
This goes into the panniers without being rummaged around. At most, it should go under the windbreaker you might put on anyway during a break. – Examples: snacks, seat cushion, soap, folding backpack
Tip 2: Packing bags for organization and quick access
Anything you don't need to have readily accessible should be sorted into packing bags. Group items according to their purpose. – Examples: shower supplies, casual clothes, sleepwear.
Suitable for this purpose:
-
Waterproof dry bags:
additional costs, additional rain protection, reusable
-
Freezer bags and plastic bags:
No extra purchase required, no additional rain protection, often unusable after a tour
-
Fruit bag:
low cost, reusable, no additional rain protection required
Tip 3: In every respect – have the courage to leave gaps.
-
Dare to leave things out!
Even if you might need them. If all else fails: kmk, you can buy it.
-
Dare to be imperfect!
Use things you already have at home and enjoy your trip for an extra day instead of buying the perfect gear. (Remember the travel bag in the wire basket.)
-
Dare to start!
You learn something new with every tour.
If something worked well for you: great!
If not: crack an egg over it!
A little anecdote to finish
Hannes had undertaken his first cycling trip with a racing bike from the 70s and a large backpack. The combination of heavy weight from above, a hard saddle, and 8 bar tire pressure is no fun in the long run!
Want more tips, cycling tour meetups and good cycling stories?
Stay informed with our newsletter. You'll regularly receive cycling trip tips and all the dates for our monthly online meetups.